And, what this should really read is "The ONLY way to do a Turkey!"...for real.

For several years now, my Gram has brined her turkey. I clearly remember the first time we had her brined turkey...*cue swirly foggy flashback photo*...The year was 2007 (or something), the day was dark and stormy (I always feel the need to add dark and stormy) and my stomach was rumbly.
Okay, anyway...one taste of that turkey and my tastebuds rejoiced. Then, to hear how it was cooked? It sealed the deal. No more needed to wake at dawn to put the turkey in the oven, this guy roasts in less that 2 hours.
Yes, you heard me right. You can have your turkey AND sleep in! I think it cooks faster because of something or other to do with the brine and the temperature it's cooked at...be warned, this turkey is so juicy you'll wonder if you've cooked it enough. ('Cuz we're all accustomed to dry turkey, right?!) A quick check with a meat thermometer to verify you're turkey has reached 165 degrees and you're golden.
Okay...the other glorious thing about this recipe? It's simple. I love delicious, simple recipes!
The brine...start with 2 gallons of cold water and add:
Kosher salt
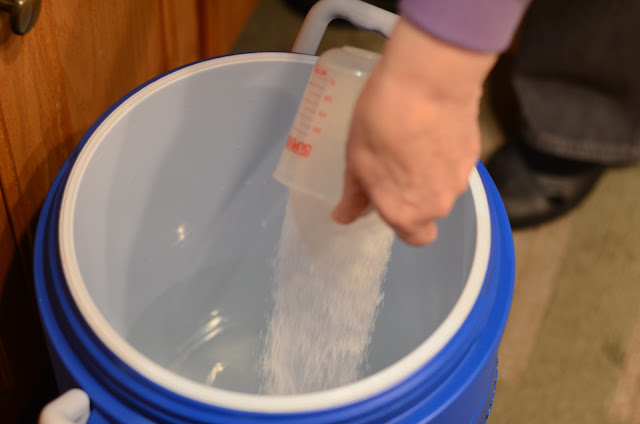

And sugar:

Stir until salt is all dissolved and THAT'S it! See? Easy peasy.
Now, if you're not entirely sure that you're salt is all the way dissolved (but try to make sure it is) put your bird "feet first" into the brine so that the breast doesn't get too salty...otherwise, breast first is fine!

My Gram likes to add ice cubes on top of her (igloo cooler...very convenient!) for added "food safety" while brining. In Minnesota, it's cool enough at this time of the year to place the cooler outside, otherwise, it should be refrigerated.
After you've brined it for a good 16-24 hours, remove the bird from it's salt bath and rinse it, then snuggle with it and cradle it:

Okay, no snuggling...but yes, the turkey is in that towel! I love my Gram. :) She makes me smile. Anyway, dry your turkey and if you feel compelled to snuggle it while you're drying, go right ahead.

Don't forget to dry the inside, too!
Next up, prepare the roaster...lots of butter:

And now, it's time to stuff it. Coarse chop carrots, celery and onions. Enough to stuff the bird...


And save some veggies for the roaster:

Rather than using a rack for the turkey, Gram uses coarse chopped veggies for the "rack"...and you should taste those carrots when it's done. Holy moly. But anyway, I digress...veggies for the rack.
And just in case we haven't used enough butter for you yet...rub the whole bird with softened butter. Just do as I say. We'll diet together after the holidays.

Place the bird breast side down on top of the veggies in the roaster:

And here's where you need to make a decision...originally, the turkey was first cooked for 45 min, then 1/4 turn to a side and cooked for 15 then to other side for 15 then to finish on back (breast up)...that has evolved for Gram into 45 min on breast and finish on back. Do what you want...it's delicious either way!!
When you turn your bird, be prepared to get some oven mitts messy...there's no better way, trust us.

And when it's all done roasting, cover it with foil for at least 15 minutes (if not a bit longer) to lock in the juices!

Just sit and stare at it for a moment...the glorious, perfectly golden turkey.
Okay, carve it now.
And enjoy!
Gram's Turkey (The Only Way to do It!)
Printable Recipe

Brine:
2 gallons of cold water
3 cups Kosher salt
1/2 cup sugar
Mix well, making sure sugar and salt is completely dissolved. Place turkey in brine for 16-24 hours, covering with ice if it makes you feel "safer", then remove from brine, rinse, and dry completely.
For inside and under turkey:
1 stalk celery (save leafy tops for dressing and by "stalk" I mean the whole clump of celery ribs...not just one and a half pieces of celery. Got it?)
1 pound of carrots
1 med-large onion
1-2 sticks butter
Coarse chop all veggies. Loosely stuff bird with veggies, leaving room for 1 stick of butter and reserving enough veggies to make a "rack" in the bottom of buttered roaster.
Cooking turkey:
Preheat oven to 425, place turkey on it's breast atop the veggies in roaster and roast for 45 minutes then flip to it's back and roast until done, approximately 1 hour. (You can do the side to side version as well...on breast for 45, to one side for 15 minutes, to other side for 15 and finish on breast 30-35 minutes). Check with meat thermometer that internal temp of turkey has reached 165 degrees, stay away from thigh bones when checking temp as they can give a "false high" reading.
When temp has reached 165 degrees, remove from oven and promptly cover tightly with tin foil for 15-30 minutes.
Carve just before serving and enjoy!
Coming this week...gravy and stuffing!


For several years now, my Gram has brined her turkey. I clearly remember the first time we had her brined turkey...*cue swirly foggy flashback photo*...The year was 2007 (or something), the day was dark and stormy (I always feel the need to add dark and stormy) and my stomach was rumbly.
Okay, anyway...one taste of that turkey and my tastebuds rejoiced. Then, to hear how it was cooked? It sealed the deal. No more needed to wake at dawn to put the turkey in the oven, this guy roasts in less that 2 hours.
Yes, you heard me right. You can have your turkey AND sleep in! I think it cooks faster because of something or other to do with the brine and the temperature it's cooked at...be warned, this turkey is so juicy you'll wonder if you've cooked it enough. ('Cuz we're all accustomed to dry turkey, right?!) A quick check with a meat thermometer to verify you're turkey has reached 165 degrees and you're golden.
Okay...the other glorious thing about this recipe? It's simple. I love delicious, simple recipes!
The brine...start with 2 gallons of cold water and add:
Kosher salt


And sugar:

Now, if you're not entirely sure that you're salt is all the way dissolved (but try to make sure it is) put your bird "feet first" into the brine so that the breast doesn't get too salty...otherwise, breast first is fine!

My Gram likes to add ice cubes on top of her (igloo cooler...very convenient!) for added "food safety" while brining. In Minnesota, it's cool enough at this time of the year to place the cooler outside, otherwise, it should be refrigerated.
After you've brined it for a good 16-24 hours, remove the bird from it's salt bath and rinse it, then snuggle with it and cradle it:

Okay, no snuggling...but yes, the turkey is in that towel! I love my Gram. :) She makes me smile. Anyway, dry your turkey and if you feel compelled to snuggle it while you're drying, go right ahead.

Don't forget to dry the inside, too!
Next up, prepare the roaster...lots of butter:

And now, it's time to stuff it. Coarse chop carrots, celery and onions. Enough to stuff the bird...

But save enough room for a stick of butter!

And save some veggies for the roaster:

Rather than using a rack for the turkey, Gram uses coarse chopped veggies for the "rack"...and you should taste those carrots when it's done. Holy moly. But anyway, I digress...veggies for the rack.
And just in case we haven't used enough butter for you yet...rub the whole bird with softened butter. Just do as I say. We'll diet together after the holidays.

Place the bird breast side down on top of the veggies in the roaster:

And here's where you need to make a decision...originally, the turkey was first cooked for 45 min, then 1/4 turn to a side and cooked for 15 then to other side for 15 then to finish on back (breast up)...that has evolved for Gram into 45 min on breast and finish on back. Do what you want...it's delicious either way!!
When you turn your bird, be prepared to get some oven mitts messy...there's no better way, trust us.

And when it's all done roasting, cover it with foil for at least 15 minutes (if not a bit longer) to lock in the juices!

When you're ready to carve it, behold the beauty...
Just sit and stare at it for a moment...the glorious, perfectly golden turkey.
Okay, carve it now.
And enjoy!
Gram's Turkey (The Only Way to do It!)
Printable Recipe

2 gallons of cold water
3 cups Kosher salt
1/2 cup sugar
Mix well, making sure sugar and salt is completely dissolved. Place turkey in brine for 16-24 hours, covering with ice if it makes you feel "safer", then remove from brine, rinse, and dry completely.
For inside and under turkey:
1 stalk celery (save leafy tops for dressing and by "stalk" I mean the whole clump of celery ribs...not just one and a half pieces of celery. Got it?)
1 pound of carrots
1 med-large onion
1-2 sticks butter
Coarse chop all veggies. Loosely stuff bird with veggies, leaving room for 1 stick of butter and reserving enough veggies to make a "rack" in the bottom of buttered roaster.
Cooking turkey:
Preheat oven to 425, place turkey on it's breast atop the veggies in roaster and roast for 45 minutes then flip to it's back and roast until done, approximately 1 hour. (You can do the side to side version as well...on breast for 45, to one side for 15 minutes, to other side for 15 and finish on breast 30-35 minutes). Check with meat thermometer that internal temp of turkey has reached 165 degrees, stay away from thigh bones when checking temp as they can give a "false high" reading.
When temp has reached 165 degrees, remove from oven and promptly cover tightly with tin foil for 15-30 minutes.
Carve just before serving and enjoy!
Coming this week...gravy and stuffing!
I brined my turkey the very first year that I had Thanksgiving and haven't done it since. I think I'm going to do it again this year. That turkey sure looks great!
ReplyDeleteI first brined my turkey after watching an episode of Good Eats with Alton Brown. I will never, ever, ever, not brine a turkey. It is so moist and juicy and delicious! Any other method of cooking turkey should be outlawed (except frying, which is also good but can be hazardous in the hands of novices).
ReplyDeleteYummy. This is making me crave turkey. If I end up making one this year I will try this recipe. Mmm Mmm
ReplyDeleteI have never cooked a turkey before. After reading your post, I think I could.
ReplyDelete